1 Configuration1.1 Jet servlet2 Action
1.2 Jet resourcesServlet
1.3 Jet config2.1 Old behave3 Forms2.1.1 Defining/Writing actions2.2 New behave
2.1.2 Writing handlers
2.2.1 Defining/Writing actions2.3 Delegate actions 2.4 Annotations
2.2.2 Writing handlers
2.4.1 Pre executed methods
2.4.2 Post executed methods
2.4.3 OnException executed methods
3.1 Defining forms4 Validation
3.2 Form elements4.1 Client side5 Localisation
4.2 Action based
4.3 Form based
6 Caching mechanisms
6.1 Caching resources like javascript validation code or images/css
6.2 ObjectPool
7 Testing and Debugging7.1 Debug modus8 Documentation
7.2 Scratchboard
7.3 Status information
8.1 Javadoc
8.2 Class diagrams
1 Configuration
1.1 Jet servlet
Quick note: You can also now specify a filter1.2 Jet resourcesServlet---snip--- <filter> <description>The JET controller filter</description> <filter-name>JET</filter-name> <filter-class>jet.filter.JetFilter</filter-class> <init-param> <description>Config files for form and action definition</description> <param-name>jetconfig</param-name> <param-value>WEB-INF/jet-config.xml,WEB-INF/jet-config_1.xml,WEB-INF/jet-config_2.xml,WEB-INF/jet-config_3.xml,WEB-INF/jet-config-login.xml</param-value> </init-param> </filter> <filter-mapping> <filter-name>JET</filter-name> <url-pattern>*.jet</url-pattern> </filter-mapping> ---snap---Configure the JetServlet in your web.xml: Defining the servlet:
Servlet mapping:<servlet>
<description>The JET controller servlet</description>
Setting the JET servlet:
Set the config files to use (comma separated list):<servlet-name>jet</servlet-name>
<servlet-class>jet.servlet.JetServlet</servlet-class>
<init-param>
<description>Config files for form and action definition</description>
<param-name>jetconfig</param-name>
<param-value>WEB-INF/jet-config.xml</param-value>
</init-param>
NOTE: the following init paramater is optional and deprecated - you can specify these elements in your config.xml if necessarySetting the localizer files to use (comma separated list).<init-param>
<description>Files for localization of messages</description>
<param-name>jetlocalizers</param-name>
<param-value>MessageResources</param-value>
</init-param>
NOTE: the following init paramater is optional and deprecated - you can specify these elements in your config.xml if necessarySetting the input and output charset encoding of JET pages:<init-param>
<description>default charset encoding</description>
<param-name>jetencoding</param-name>
<param-value>UTF-8</param-value>
</init-param>
NOTE: the following init paramater is optional and deprecated - you can specify these elements in your config.xml if necessarySetting the amount of prebuild forms in jet.pool.ObjectPool:<init-param>
<description>Define here how many clones of the defined forms should be preloaded</description>
<param-name>jetformpoolsize</param-name>
<param-value>200</param-value>
</init-param>
NOTE: the following init paramater is optional and deprecated - you can specify these elements in your config.xml if necessarySame as with the form pool - just for the actions defined:<init-param>
<description>Define here how many clones of the defined actions should be preloaded</description>
<param-name>jetactionpoolsize</param-name>
<param-value>200</param-value>
</init-param>
NOTE: the following init paramater is optional and deprecated - you can specify these elements in your config.xml if necessarySetting debug modus:<init-param>
<description>List of host regex where debug is allowed</description>
<param-name>jetdebug</param-name>
<param-value>localhost,jet.sourceforge.net</param-value>
</init-param>
For the most setups the debug modus would be a security reason. therefore you can define for which ip and/or server names it is allowed to access the debug modus. Example:
http://<server>:/webapp/index.ftl?jetdebug=true NOTE: the debug modus is session based - to disable the debug modus call a jet page with ?jetdebug=falseNOTE: the following init paramater is optional and deprecated - you can specify these elements in your config.xml if necessarySetting ip/host which is allowed to access status informations:<init-param>
<description>List of host regex where status is allowed</description>
<param-name>jetstatus</param-name>
<param-value>localhost,jet.sourceforge.net</param-value>
</init-param>
Same as above. Example:
http://<server>:/webapp/index.ftl?jetstatusNOTE: the following init paramater is optional and deprecated - you can specify these elements in your config.xml if necessarySetting which ip/hostis allowed to call refresh on jet:<init-param>
<description>List of host regex where refresh is allowed</description>
<param-name>jetrefresh</param-name>
<param-value>localhost,jet.sourceforge.net</param-value>
</init-param>
Same as above. With "jetrefresh" you can refresh the caches, not the ObjectPools (they don't need to be refreshed). Example:
http://<server>:/webapp/index.ftl?jetrefresh=all Available commands are:
all = refreshing all caches. localizer = refreshing localizer cache. resourcecache = refreshing the cache for the javascript validation etc. resourceservlet = refreshing the caches of the resource servlet. templateengine = refreshing the freemarker template engine. </servlet>
<servlet-mapping>
<servlet-name>jet</servlet-name>
<url-pattern>*.jet</url-pattern>
</servlet-mapping>
Defines the urls to use jet. You can also map that everything behind "/jet/" is jet page.
Configure the JetResourceServlet if you want to provide images etc. via jar files:1.3 Jet configServlet mapping:<servlet>
<description>The JET resource servlet</description>Define resource servlet:<servlet-name>jetresource</servlet-name>
<servlet-class>jet.servlet.JetResourceServlet</servlet-class>
Setting ip/host which is allowed to activate debug informations:<init-param>
<description>List of host regex where debug is allowed</description>
<param-name>jetdebug</param-name>
<param-value>localhost,jet.sourceforge.net</param-value>
</init-param>
Setting ip/host which is allowed to access status informations:<init-param>
<description>List of host regex where status is allowed</description>
<param-name>jetstatus</param-name>
<param-value>localhost,jet.sourceforge.net</param-value>
</init-param>
</servlet>
As in the "index.ftl" example template you can refer to a image/css and other resources provided by jar files like this:<servlet-mapping>
<servlet-name>jetresource</servlet-name>
<url-pattern>/resource</url-pattern>
</servlet-mapping><img class="jet" src="${context}/resource?file=img/jet.gif"/>
<JetConfigproject-name="testconfig"><!-- the project name has no special meaning, it's only a identifier for the project used. //-->encoding: Setting the input and output charset encoding of JET pages.
formpoolsize: Setting the amount of prebuild forms in jet.pool.ObjectPool.
actionpoolsize: Same as with the form pool - just for the actions defined.
<JetServletencoding="UTF-8" formpoolsize="30" actionpoolsize="40">
For the most setups the debug modus would be a security reason. therefore you can define for which ip and/or server names it is allowed to access the debug modus.
Example:
http://<server>:/webapp/index.ftl?jetdebug=true
NOTE: the debug modus is session based - to disable the debug modus call a jet page with ?jetdebug=false
<JetDebug>127.0.0.1</JetDebug>
Same as above. With "jetrefresh" you can refresh the caches, not the ObjectPools (they don't need to be refreshed). Example:
http://<server>:/webapp/index.ftl?jetrefresh=all
Available commands are:
all = refreshing all caches.
localizer = refreshing localizer cache.
resourcecache = refreshing the cache for the javascript validation etc.
resourceservlet = refreshing the caches of the resource servlet.
templateengine = refreshing the freemarker template engine.
<JetRefresh>127.0.0.1</JetRefresh>
Same as above. Example:
http://<server>:/webapp/index.ftl?jetstatus
<JetStatus>127.0.0.1</JetStatus>
Setting the localizer files to use (comma separated list).
<JetLocalizers>MessageResourses</JetLocalizers>
As follows you can define plugins, these plugns are loaded/activated before the initialzation of the JetServlet is done. You would have access to the Servletconetxt, so you are able to load/initilaize caches etc.
<JetPluginclass="jet.examples.ExamplePlugin"/>
As follows you can specify global exception handlers e.g. to avoid displaying errors happened in your action e.g. database down etc.
<JetExceptionHandler>jet.examples.GlobalExceptionExamples#displayException</JetExceptionHandler>
For configuring the template engine you can specify an configurator which provides a Properties object with Freemarker parameters and some special jet parameters.
The following properties could be set:
freemarker parameters
parameter defined by jet:
default_encoding -> the default encoding for the templates
template_update_delay -> delay for updating templates from source
<FreemarkerConfigurator>jet.freemarker.FreemarkerConfigurator#getProperties</FreemarkerConfigurator>
</JetServlet><JetInput>
<!-- defining form elements - see 3.1 Defining forms //--!></JetInput>
...
<JetForm>
<!-- defining the form - see 3.1 Defining forms //--!></JetForm>
...
<JetAction>
<!-- defining the action - see 2.1 Defining actions //--!></JetAction>
...
In your web.xml you can specify more than one config file, so you can separate the different parts of your webapp in smaller peaces. 2 Action
2.1 Old behave 2.1.1 Defining actions Actions must be defined in jet-config.xml like the forms. You can define actions with the JetAction tag like the following:
<JetActionurl="/index.jet" template="jet.ftl.pages.index"/>
<JetActionurl="/helloworld.jet" handler="jet.examples.HelloWorldAction" transfer-encoding="gzipped"/>
<JetActionurl="/loginform.jet" handler="jet.examples.LoginFormAction" validate="false"/>
<JetActionurl="/loginform2.jet" handler="jet.examples.LoginFormAction2" formid="loginform"/>
The url given is the url under which the action is reachable. If you define a template on the jetaction the template will be printed. If you need java (which will be the most case) e.g. to act on a database before printing a template you can specifiy a handler instead of a template - the handler can call different templates or delegate to a different action, so specifiying also a template will make no sense. If you specify a formid (form identifier) from a previous defined form you can easily access request parameters and validate to the form specified. If validations on the form specified and on the action the attributevalidate="false"is set the form will not be validated on this action. Withtransfer-encodingyou can specify that the content will be transferred compressed with gzip. 2.1.2 Writing handlers
The JET Actions have to be extended by jet.servlet.JetAction or a child of it.
Given Parameters:
JetMessages messages - contains messages, specially from validations.Example Action:
JetData data - contains hashmaps of the request and session data. Contains also the messages provided by the localizer files.
JetForm form - the form for the action to encode parameters - null if no form is specified in configuration.
JetContext jetContext - Context object providing all necessary objects like the HttpRequest object etc.
public class HelloWorldAction extends JetAction{

    public void execute( JetMessages messages, JetData data, JetForm form, JetContext jetContext )
	throws JetActionException, IOException{

        if(form != null){ //test2.jet called
            data.add( "newform", form.decodeForm(jetContext) );
        }else{ //test.jet called
            data.add( "newform", jetContext.getFormByUrl("/test2.jet").decodeForm(jetContext) );
        }

        render( data, "jet.ftl.pages.helloworld" );

    }


}
2.2 New behave 2.2.1 Defining actions Actions must be defined in jet-config.xml like the old behave. New is that not only a Class is specified, also the method to execute:
<JetActionurl="/helloworld.jet" handler="jet.examples.MyAction#methodToExecute" transfer-encoding="gzipped"/>
Same attributes like the old behave. 2.2.2 Writing handlers
On the new behave the JET Actions have NOT to be extended by jet.servlet.JetAction or a child of it. Just define a method and specify one of the below listed parameter types as you wish/need.:
Given Parameters:
JetMessages messages - contains messages, specially from validations.Example Action:
JetData data - contains hashmaps of the request and session data. Contains also the messages provided by the localizer files.
JetForm form - the form for the action to encode parameters - null if no form is specified in configuration.
JetConverer converter - holds an instance of the form - you can directly get converted field values.
JetContext jetContext - Context object providing all necessary objects like the HttpRequest object etc.
HttpServletRequest request - the servlet request object like on servlets exists HttpServletResponse reponse - the servlet response object like on servlets exists
public class NewBehaveAction {

    public void myexecute( JetData data, JetForm form, JetContext jetContext )
	throws JetActionException, IOException{

        if(form != null){ //test2.jet called
            data.add( "newform", form.decodeForm(jetContext) );
        }else{ //test.jet called
            data.add( "newform", jetContext.getFormByUrl("/test2.jet").decodeForm(jetContext) );
        }

        context.render( data, "jet.ftl.pages.helloworld" );

    }


}
NOTE: The new behave supports no special 'validate' method. Form validation is the same.2.3 Delegate actions
The design of JET actions allows you to delegate between the actions. For examle if you have already written an action which does already the necessary tasks, but you want to depend it on a different action.2.4 Annotations... delegateTo( "/otheraction.jet", jetContext, form ); //--> delegates using the current form instance delegateTo( "/thirdaction.jet", jetContext ); //--> delegates fetching the request parameters in form as defined in config
The following annotations exists: example:3 Forms---snip--- public class FreeformExampleAction { @OnException(method="errortest") @PreAction(method={"premethod"}) @PostAction(method={"postmethod"}) public void exampleActionMethod( JetData data, JetConverter form, JetContext context) throws JetActionException, IOException{ throw new NullPointerException("123"); //context.render(data, "jet.ftl.pages.helloworld"); } ---snap---Similar to the freeform actions the parameters were filled as defined - you could choose also from the same like for freeform actions. For OnException, you have to specify the exception also - if not it would not be called! 2.4.1 Pre executed methods
You have to specify an array of method names as you can specify more than one pre action Pre methods could return a boolean if the other methods and the action should be called or not - if none returned it will be continuted as defined.2.4.2 Post executed methods
You have to specify an array of method names as you can specify more than one post action2.4.3 OnException executed methods
if this action occurs in the pre actions, on the action itself or the post actions - the defined class/method is called.
3.1 Defining formsThe form definition follows the rules defined in the DTD http://jet.sourceforge.net/dtds/jet_beta2.dtd. You will find the corresponding dtd provided in the jet.jar.<JetConfigproject-name="testconfig">
<JetFormid="testform" action="/test2.jet">
<JetGridPanelid="logingrid" cols="2">
<JetLabelid="lbllogin">
<setname="content" value="login:"/>
</JetLabel>
<JetInputid="login"/>
<JetLabelid="lblpassword">
<setname="content" value="password:"/>
</JetLabel>
<JetInputid="password">
<setname="inputtype" value="password"/>
</JetInput>
<JetSubmitid="go"/>
</JetGridPanel>
</JetForm>
3.2 Form elements
Here I describe the built in html elements. If you need other elements or elements with different behave/rendering you can write your own by extending in jet.html.internal.JetInputComponent, jet.html.internal.JetOutputComponent or one of the existing elements like done by the jet.html.JetRadioButton. On each element you can define event,validate or set methods in the xml config with the corresponding xml tags. On the grid elements you can also specify4 Validationreftags to refer to already defined tags for reuse. Which tags can be used on which element, please see below:JetButton<eventtype="onMouseOver..." call="javascript:testFunction(this);"/><validatetype="client or server" rule="minlength..."/><setname="value" value=""/><setname="label" value=""/><setname="messageKey" value=""/><setname="buttonType" value=""/>JetCheckBox<eventtype="onMouseOver..." call="javascript:testFunction(this);"/><validatetype="client or server" rule="minlength..."/><setname="value" value=""/><setname="defaultchecked" value=""/>JetDisplayMessage<setname="refid" value=""/>JetFieldset cols="2"<refname="id" value=""/>JetFile<setname="messageKey" value=""/>JetForm action="" method="POST" extend="formid"<refname="id" value=""/><setname="enctype" value=""/>JetGridPanel cols="1"<refname="id" value=""/>JetGridPanel2 cols="3"<refname="id" value=""/>JetImage<setname="urlKey" value=""/><setname="altKey" value=""/>JetInput<eventtype="onMouseOver..." call="javascript:testFunction(this);"/><validatetype="client or server" rule="minlength..."/><setname="value" value=""/><setname="inputtype" value=""/>JetLabel<setname="messageKey" value=""/><setname="content" value=""/>JetOption<setname="key" value=""/><setname="value" value=""/><setname="defaultselected" value=""/>JetOutput<setname="messageKey" value=""/><setname="content" value=""/>JetRadiobutton<eventtype="onMouseOver..." call="javascript:testFunction(this);"/><validatetype="client or server" rule="minlength..."/><setname="value" value=""/>JetSelection<eventtype="onMouseOver..." call="javascript:testFunction(this);"/><validatetype="client or server" rule="minlength..."/><setname="multiple" value=""/>JetTextArea<eventtype="onMouseOver..." call="javascript:testFunction(this);"/><validatetype="client or server" rule="minlength..."/><setname="value" value=""/>The event support is just implemented to show that it is possible to implement it and for quick usage - but it is deprecated or let me say "DO NOT USE IF POSSIBLE". Use CSS to do javascript events like onMouseOver.
4.1 Client side
You can on each input field add validation rules. If you specify the type - e.g. here client the validation will be done server side and client side for security reasons.4.2 Action based
<JetInputid="password">
<validatetype="client" name="required"/>
</JetInput>
possible validation types:
required
checked (same as required)
minlength (one argument required)
maxlength (one argument required)
match (one argument, the regex is required)
int
short
byte
creditcard
date
float
floatrange (two arguments min and max required)
intrange (two arguments min and max required)
validatewhen (one argument, the id of the related field required)
<JetFieldsetid="password">
<validatetype="client" name="checked"><arg>1</arg></validate>
</JetFieldset>
possible validation types:
checked (one argument, how many checkboxes or radiobuttons are required)
Special validation messages could be set via the "messageKey" attribute.
You can add action based validation if you implement jet.validation.JetValidation interface in your action. here you can write special action based validations or do more complex validations where you need database access etc.4.3 Form based
Form based validation could be added as under 4.1 described. form based validation is always done even the action has no validation. Only with the attribute "validate" set to "false" on the action definition you can suspress the form based validation for the action defined. The validation generates error messages and adds them to the message object of the action. If you wan't to react on the errors - like redisplaying the form you have to do this yourself. JET provides no general behave of exceptions or validation errors.5 Localisation
The localizer file configured in the web.xml file is used for localization. Each key of the localizer files can be used by the prefix : message.<key>6 Caching mechanisms
See the getting started page.
6.1 Caching resources like javascript validation code or images/css
6.2 ObjectPool
The ObjectPool ist just for internal pooling of actions, forms etc.7 Testing and Debugging
7.1 Debug modus
The debug modus gives you the ability to see what data are available in Hashmap. e.g:7.2 Scratchboardcontext=/jet-examples-webapp message.errors.footer=</UL></FONT> message.errors.suffix=</LI> message.errors.header=<FONT color="red"><UL> message.errors.prefix=<LI> message.infos.footer=</UL></FONT> message.infos.suffix=</LI> message.infos.prefix=<LI> message.infos.header=<FONT color="blue"><UL> message.helloworld.txt1=Hello World! message.error.creditcard= message.error.byte= message.error.maxlength=Field {0} is greater than {1} characters message.error.required=The field {0} is required message.error.doublerange= message.error.int=The field {0} is not an int message.error.shortrange= message.error.date= message.error.double= message.error.floatrange= message.error.longrange= message.error.intrange= message.error.byterange= message.error.float= message.error.email= message.error.empty=The field {0} is not empty message.error.minlength=Field {0} is lower than {1} characters message.warns.footer=</UL></FONT> message.warns.suffix=</LI> message.warns.prefix=<LI> message.warns.header=<FONT color="yellow"><UL> newform=<form id=...
If you want to use the scratchboard. change the examplesproperty file to setup your own. To run the scratchboard you need the following jar's in yourCLASSPATH.export CLASSPATH=Then change to the source dir and start it like the following (propertyfile without '.property'):
<source directory of property file>:
/jet.jar:
/jet-examples.jar:
/jakarta-tomcat-5.5.7/common/lib/servlet-api.jar:
/WEB-INF/lib/freemarker.jar:
/WEB-INF/lib/ehcache-1.1.jar:
/WEB-INF/lib/commons-validator.jar:
/WEB-INF/lib/commons-beanutils-bean-collections.jar:
/WEB-INF/lib/commons-beanutils-core.jar:
/WEB-INF/lib/commons-beanutils.jar:
/WEB-INF/lib/commons-collections.jar:
/WEB-INF/lib/commons-logging.jar:
/WEB-INF/classes/:
java jet.scratchboard.ScratchBoard jet/scratchboard/yourscratchboardpropertiesfile Take care that you have set the correct browser in the properties file. 7.3 Status information
if configured to be allowed and you request an action like the following you should see a short (to be improoved status print):8 Documentation
http://www.vestopia.de/jet-examples-webapp-beta3-bf3/index.jet?jetstatus=true
8.1 Javadoc
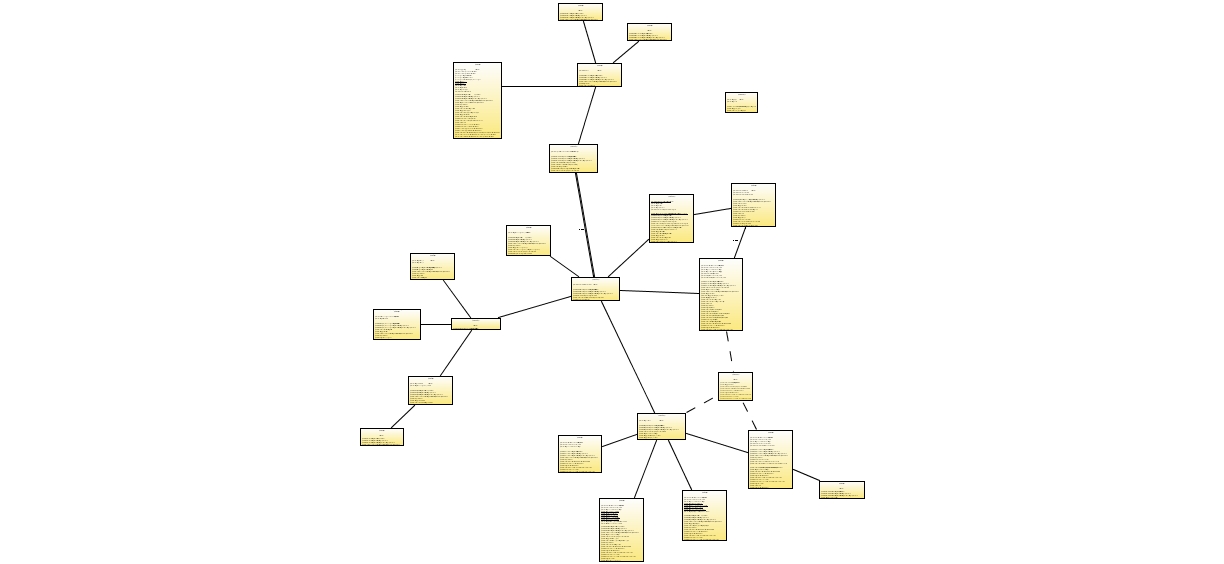
For the javadoc, please see here:8.2 Class diagrams
javadoc
The core system:
The component structure: