If you only want to see it running, please have a look at the examples page
NOTE: If you search for a "blank" webapp download here
Easy way of coding:If you are also a programmer who likes to <#code> and <#uncode> your life, so I will suggest using the Netbeans IDE 5.5 which comes with everything you need to make your business to success without spending a lot of time in installing all parts necessary, configureing it and creating unmaintainable built files.
Download from http://www.netbeans.org install it as the normal user and start it. If it runs you can start the tomcat opening the window->runtime then "server" and start the tomcat by right clicking and chosing start
 To deploy the examples war you can either create a new web project and "move/copy" all config files and libraries into the new project
or have a look at the ~/.netbeans/5.5/apache-tomcat-5.5.17_base/conf/tomcat-users.xml - there is a user "ide"
use this credentials if you try to login at the tomcat management console (normally http://localhost:8084/manager/html).
creating new Project and use blank webapp as source
To deploy the examples war you can either create a new web project and "move/copy" all config files and libraries into the new project
or have a look at the ~/.netbeans/5.5/apache-tomcat-5.5.17_base/conf/tomcat-users.xml - there is a user "ide"
use this credentials if you try to login at the tomcat management console (normally http://localhost:8084/manager/html).
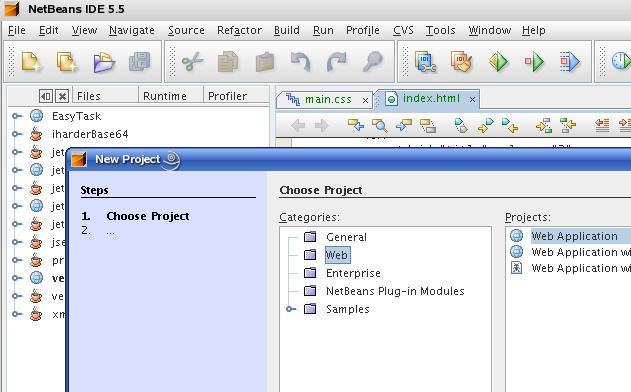
creating new Project and use blank webapp as sourceClick on File->New Project then choose "Web" then "Web Application".
 Then Provide some Information about the Project:
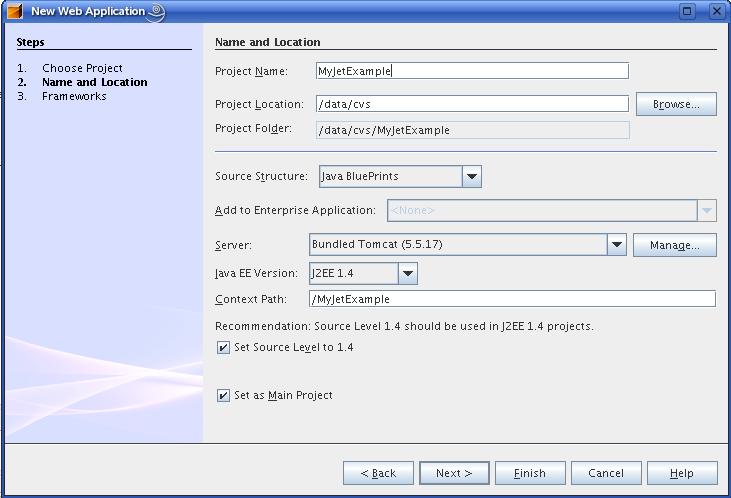 If you want to combine with other framework you can choose one, but is not necessary, just click Finish:
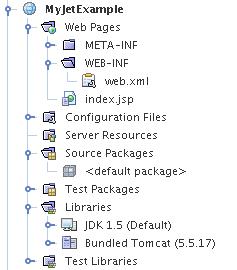
 Now you should have the same Structure as below:
 What we have now to do is to copy necessary files into out new project structur:
NOTE: For this close Netbeans.
What we have now to do is to copy necessary files into out new project structur:
NOTE: For this close Netbeans.
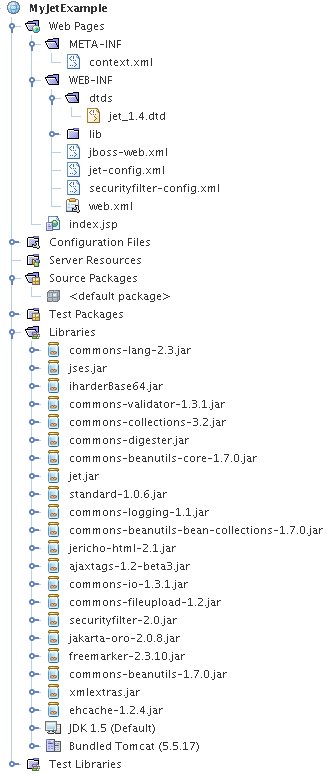
	$ >unzip <blank-webapp.war>
	$ >cp <path-to-blank-webapp>/WEB-INF/lib/* <project>/web/WEB-INF/lib/.
	$ >cp <path-to-blank-webapp>/WEB-INF/*.xml <project>/web/WEB-INF/.
	#remove the jboss-web.xml if necessary
	$ >cp <path-to-blank-webapp>/WEB-INF/classes/ehcache.xml <project>/src/.
	$ >cp <path-to-blank-webapp>/WEB-INF/classes/FreemarkerConfiguration.properties <project>/src/.
	$ >cp <path-to-blank-webapp>/WEB-INF/classes/MessageResources.properties <project>/src/.
	#(create for each language you need a file
	$ >cp -r <path-to-blank-webapp>/WEB-INF/dtds <project>/web/WEB-INF/.
	$ >cp <path-to-blank-webapp>/WEB-INF/index.html <project>/web/. #or create an appropiate one
Now you should have the following library structure and config and source files:
 Changing config
jet-config.xml:
There is already an action configured, we can use this one for testing.
securityfilter-config.xml:
Please have a look in the documetation of Securityfilter, you can let it as it is for the test below.
web.xml:
The resource servlet is necessary for fetching images,css and js files from jar's.
The JET Filter handles the requests *.jet.
The SecurityFilter could be used/configured to secure pages
So in general nothing to change...
The only thing you have to change is what files could be fetched via the JET Resource Servlet Creating first action and test it
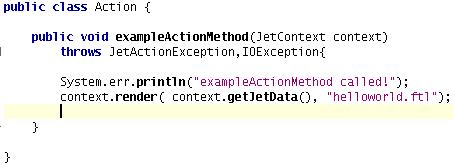
So create a package: "yourfirst" and a class "Action" add a Method exampleActionMethod. add command for rendering the page helloworld.ftl:
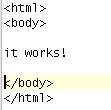
 Create Freemarker template:
Create a the "base" folder for in webapp development (you can also put the ftl in a jar): $ >mkdir <path-to-blank-webapp>/WEB-INF/ftl/ Create a file in base folder "ftl" "helloworld.ftl":
 For a good, easy and detailed explanation of freemarker look at freemarker.org.
Access action/url:
Deploy project - after this you should be able to access the webapp under:
http://localhost:8084/MyJetExample/index.jet
